Visualizing Imagery
CesiumJS supports drawing and layering high-resolution imagery (maps) from many services, including Cesium ion. Use Cesium ion to stream curated high-resolution imagery or tile your own imagery layers from raster data to CesiumJS apps. Layers can be ordered and blended together. Each layer’s brightness, contrast, gamma, hue, and saturation can be dynamically changed. This tutorial introduces imagery layer concepts and the related CesiumJS APIs.
Have your own imagery? See the Tiling Drone or Satellite Imagery tutorial.
Open the Hello World example in Sandcastle. This example creates a Viewer widget with a single layer rendering Bing Maps Aerial imagery streaming through Cesium ion. Specify a different base layer by providing an additional parameter to the Viewer constructor. Let’s use Bing Maps labeled imagery:
// Your access token can be found at: https://ion.cesium.com/tokens.
// Replace `your_access_token` with your Cesium ion access token.
Cesium.Ion.defaultAccessToken = "your_access_token";

const viewer = new Cesium.Viewer("cesiumContainer", {
  baseLayer: Cesium.ImageryLayer.fromWorldImagery({
    style: Cesium.IonWorldImageryStyle.AERIAL_WITH_LABELS,
  }),
  baseLayerPicker: false,
});
Create a Cesium ion account
This tutorial uses imagery served from Cesium ion. Create an account to get your access token to use the imagery in this tutorial. Sign up here and the above sample code will automatically update with your token. If you already have an account, sign in.
After modifying the example, press F8 to run it.
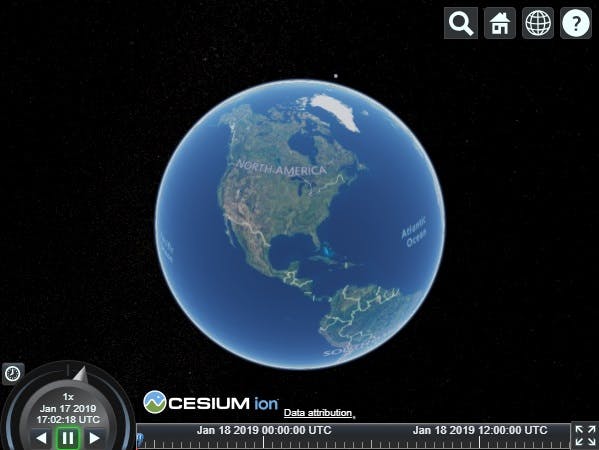
As you zoom in and out, the layer streams in as needed.
Add another Cesium ion imagery layer: Earth at Night.
const blackMarble = Cesium.ImageryLayer.fromProviderAsync(
  Cesium.IonImageryProvider.fromAssetId(3812)
);
layers.add(blackMarble);
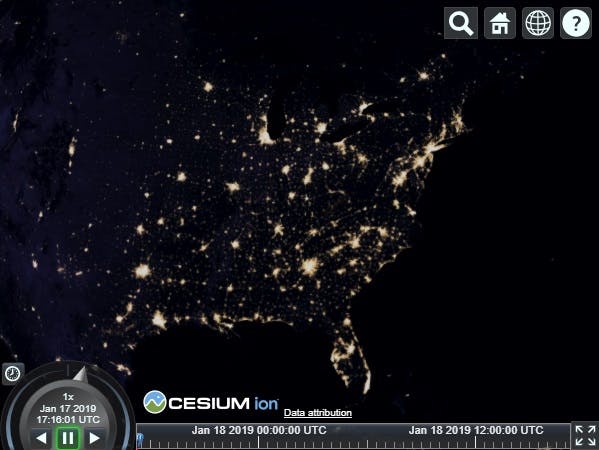
Since it was added last and covers the full extent of the globe, the Black Marble layer covers up the Bing layer. We could move Black Marble to the bottom with layers.lower(blackMarble);, but instead let’s blend it with the Bing layer so we have a better sense of how the two layers relate:
blackMarble.alpha = 0.5; // 0.0 is transparent. 1.0 is opaque.
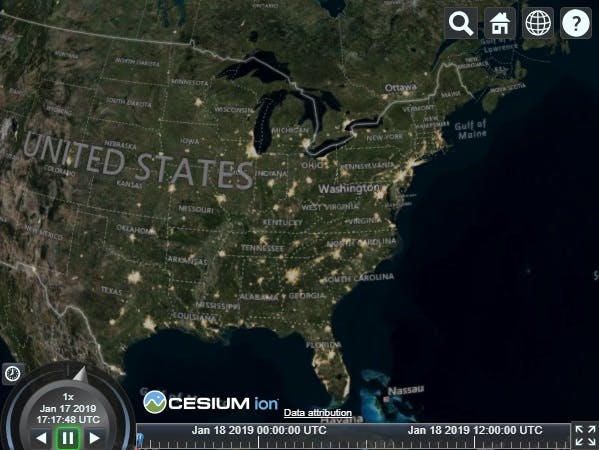
Next, increase the brightness of the lights:
blackMarble.brightness = 2.0; // > 1.0 increases brightness. < 1.0 decreases.
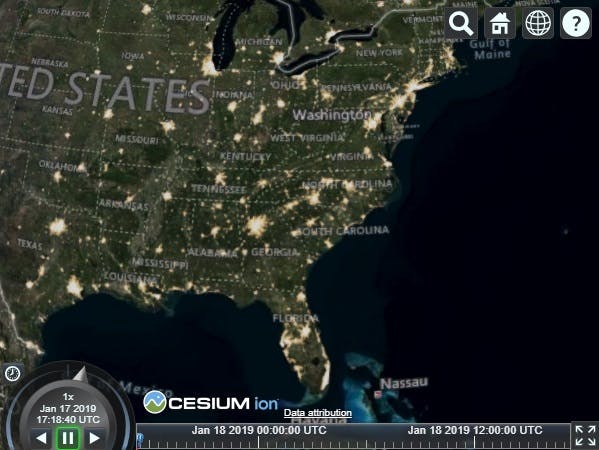
To finish, add a third layer that draws a single image over a particular extent.
const cesiumLogo = Cesium.ImageryLayer.fromProviderAsync(
  Cesium.SingleTileImageryProvider.fromUrl(
    "../images/Cesium_Logo_overlay.png",
    {
      rectangle: Cesium.Rectangle.fromDegrees(
        -75.0,
        28.0,
        -67.0,
        29.75
      ),
    }
  )
);
layers.add(cesiumLogo);
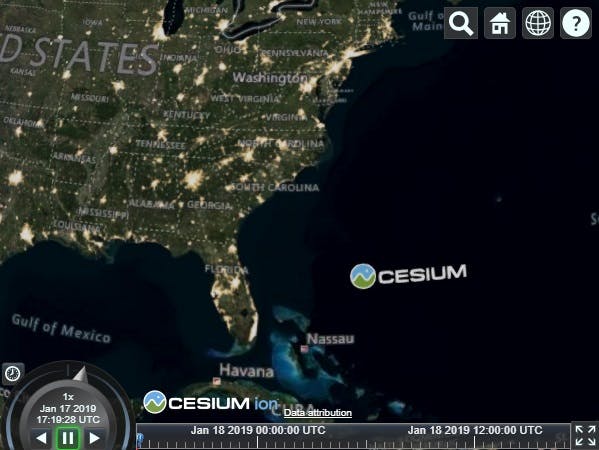
This is the complete code:
Cesium.Ion.defaultAccessToken = "your_access_token";
const viewer = new Cesium.Viewer("cesiumContainer", {
  baseLayer: Cesium.ImageryLayer.fromWorldImagery({
    style: Cesium.IonWorldImageryStyle.AERIAL_WITH_LABELS,
  }),
  baseLayerPicker: false,
});
const layers = viewer.scene.imageryLayers;

const blackMarble = Cesium.ImageryLayer.fromProviderAsync(
  Cesium.IonImageryProvider.fromAssetId(3812)
);
blackMarble.alpha = 0.5;
blackMarble.brightness = 2.0;
layers.add(blackMarble);

const cesiumLogo = Cesium.ImageryLayer.fromProviderAsync(
  Cesium.SingleTileImageryProvider.fromUrl(
    "../images/Cesium_Logo_overlay.png",
    {
      rectangle: Cesium.Rectangle.fromDegrees(
        -75.0,
        28.0,
        -67.0,
        29.75
      ),
    }
  )
);
layers.add(cesiumLogo);
See the full example in Sandcastle.
The ion Assets tab in Sandcastle contains more imagery tilesets hosted by Cesium ion that can be added to CesiumJS apps with a couple of lines of code. Many of these tilesets are also available for on-premises use.
High-resolution imagery like the first two layers used above is too large to fit into memory or often even a single disk, so imagery is divided into smaller images, called tiles, that can be streamed to a client as needed based on the view. Cesium supports several standards for requesting tiles using imagery providers. Most imagery providers use a REST interface over HTTP to request tiles. Imagery providers differ based on how requests are formatted and how tiles are organized. Cesium has the following imagery providers:
- WebMapServiceImageryProvider: Web Map Service (WMS), an OGC standard for requesting map tiles for a geographic region from distributed geospatial databases.
- TileMapServiceImageryProvider: Tile Map Service (TMS), a REST interface for accessing map tiles. Tiles can be generated with Cesium ion or GDAL2Tiles.
- WebMapTileServiceImageryProvider: OpenGIS Web Map Tile Service (WMTS), an OGC standard for serving pre-rendered georeferenced map tiles over the internet.
- OpenStreetMapImageryProvider: access to OpenStreetMap tiles or any Slippy map tiles. There are several ways to host these tiles.
- BingMapsImageryProvider: uses Bing Maps REST Services to access tiles. A Bing Maps key can be created at https://www.bingmapsportal.com/.
- ArcGisMapServerImageryProvider: uses the Esri ArcGIS Server REST API to access tiles hosted by an ArcGIS MapServer.
- GoogleEarthEnterpriseMapsProvider: provides access to the imagery stored in your organization’s Google Earth Enterprise server.
- MapboxImageryProvider: uses the Mapbox API to access tiles. Create an account and supply your access token.
- SingleTileImageryProvider: create a tile from a single image.
- UrlTemplateImageryProvider: create custom tiling schemes. Connect to a wide array of imagery sources by using a URL template. For example, a URL template for TMS is //path-to-tiles/{z}/{x}/{reverseY}.jpg.
- TileCoordinatesImageryProvider: shows how the globe is divided into tiles in a particular tiling scheme by drawing a border around each tile and labeling it with its level, X, and Y coordinates.
As a security measure, web browsers prevent JavaScript code from reading an image that comes from a different site. In particular, WebGL applications like CesiumJS are forbidden from using images as textures if those images (imagery tiles in our case) come from a different host name or port and the server does not explicitly allow the images to be used in this way. The server indicates the images do not contain confidential information, and it is therefore safe for other sites to read their pixels, by including Cross-Origin Resource Sharing (CORS) headers in the HTTP response.
Unfortunately, not all imagery services support CORS. For those that don’t, a proxy server at the same origin as the website hosting your app must be used. When using such a proxy, tiles appear to the web browser and the CesiumJS client as if they came from the same origin. To use a proxy with an imagery provider, use the proxy property when constructing the imagery provider. Cesium includes a simple proxy written in Node.js for development purposes.
layers.addImageryProvider(
  new Cesium.WebMapServiceImageryProvider({
    url: new Cesium.Resource({
      url: "/path/to/imagery",
      proxy: new Cesium.DefaultProxy("/proxy/"),
    }),
    layers: [...]
  })
);
If you are hosting public imagery, we encourage enabling CORS as described here instead of using a proxy.
So far, we haven’t clearly differentiated between imagery providers and layers. An imagery provider makes requests for tiles using a particular service, while a layer represents displayed tiles from an imagery provider. For example,
const layer = layers.addImageryProvider(imageryProvider);
is shorthand for
const layer = new Cesium.ImageryLayer(imageryProvider);
layers.add(layer);
We usually construct an imagery provider just to create a layer; then we manipulate the layer to change its visual appearance using its properties such as show, alpha, brightness, and contrast. See ImageryLayer. Decoupling imagery providers and layers makes it easier to write new imagery providers.
An imagery layer collection, like layers in the above examples, determines the order in which layers are drawn. Layers are drawn bottom-to-top based on the order they are added. Imagery layer collections are manipulated like any other collection in Cesium using functions such as add, remove, and get. In addition, layers can be reordered using raise, raiseToTop, lower, and lowerToBottom. See ImageryLayerCollection.
Several imagery providers, such as IonImageryProvider and BingMapsImageryProvider, require making asynchronous web requests to initialize. There are two ways to handle this. The first, we've used in all the above examples: ImageryLayer.fromProviderAsync is a helper which will handle the async code flow behind the scenes, making your app code entirely synchronous.
However, if more control is need over flow or potential error handling, it's possible to create asynchronous imagery providers with fromUrl factory functions.
let imageryProvider;
try {
  // Blue Marble Next Generation July, 2004 imagery from NASA
  imageryProvider = await Cesium.IonImageryProvider.fromAssetId(3845);
} catch(error) {
  console.log(`There was an error while creating the imagery provider: ${error}`);
}

const imageryLayer = new Cesium.ImageryLayer(imageryProvider);

const viewer = new Cesium.Viewer("cesiumContainer", {
  baseLayer: imageryLayer
});
Check out the imagery layers examples in Sandcastle:
- Imagery Layers—code example from this tutorial.
- Imagery Layers Manipulation—layer imagery from multiple sources, and adjust the alpha of each independently.
- Imagery Adjustment—adjust brightness, contrast, gamma, hue, and saturation of an imagery layer.
In addition, check out the reference documentation: