Cesium ion for Autodesk Revit Quickstart
Cesium ion for Autodesk Revit enables you to effortlessly export your Autodesk Revit designs to Cesium ion and stream them as 3D Tiles to CesiumJS and other applications. Follow this guide to connect Autodesk Revit to Cesium ion.

You’ll learn how to:
- Add the Cesium ion plugin to Autodesk Revit.
- Connect to your Cesium ion account in Revit.
- Export your model to Cesium ion to be tiled as 3D Tiles.
- Visualize your model in CesiumJS or other applications.
By leveraging Cesium ion and the power of 3D Tiles, even multi-gigabyte models can be streamed to any device without having to download the entire tileset up front. By visualizing 3D Tiles within CesiumJS or another runtime engine, you can fuse your models with other datasets, add geospatial context to place it at a real-world location, or perform analysis and overlap additional details.
- A Cesium ion account.
- An installed version of Autodesk Revit; 2022-2025 versions are supported.
The Cesium ion for Autodesk Revit add-in can be downloaded and installed directly from the Autodesk App Store.
Once the installation is complete, you will see a Cesium ribbon at the top of the application.
To export your current 3D View, open the Cesium ribbon and click Connect to connect to Cesium ion.

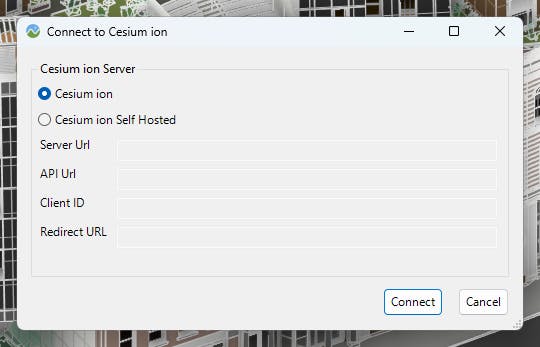
You can select to connect to either Cesium ion or your Cesium ion Self Hosted server.
Cesium ion: Connect to your Cesium ion SaaS account.
Cesium ion Self-Hosted: Connect to your Cesium ion server by providing:
- Server URL
- API URL
- Client ID
- Redirect URL
Once you have selected the appropriate Cesium ion server:
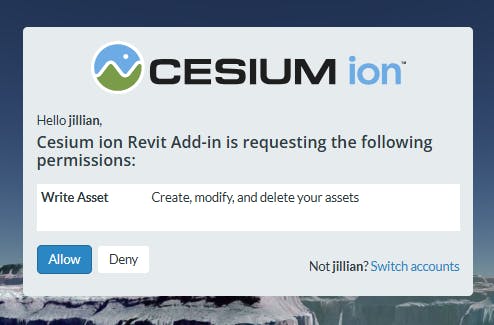
- Click Connect; this will open a browser window.
- Follow the prompts to complete sign in.
- Click Allow access to complete the connection to Revit.
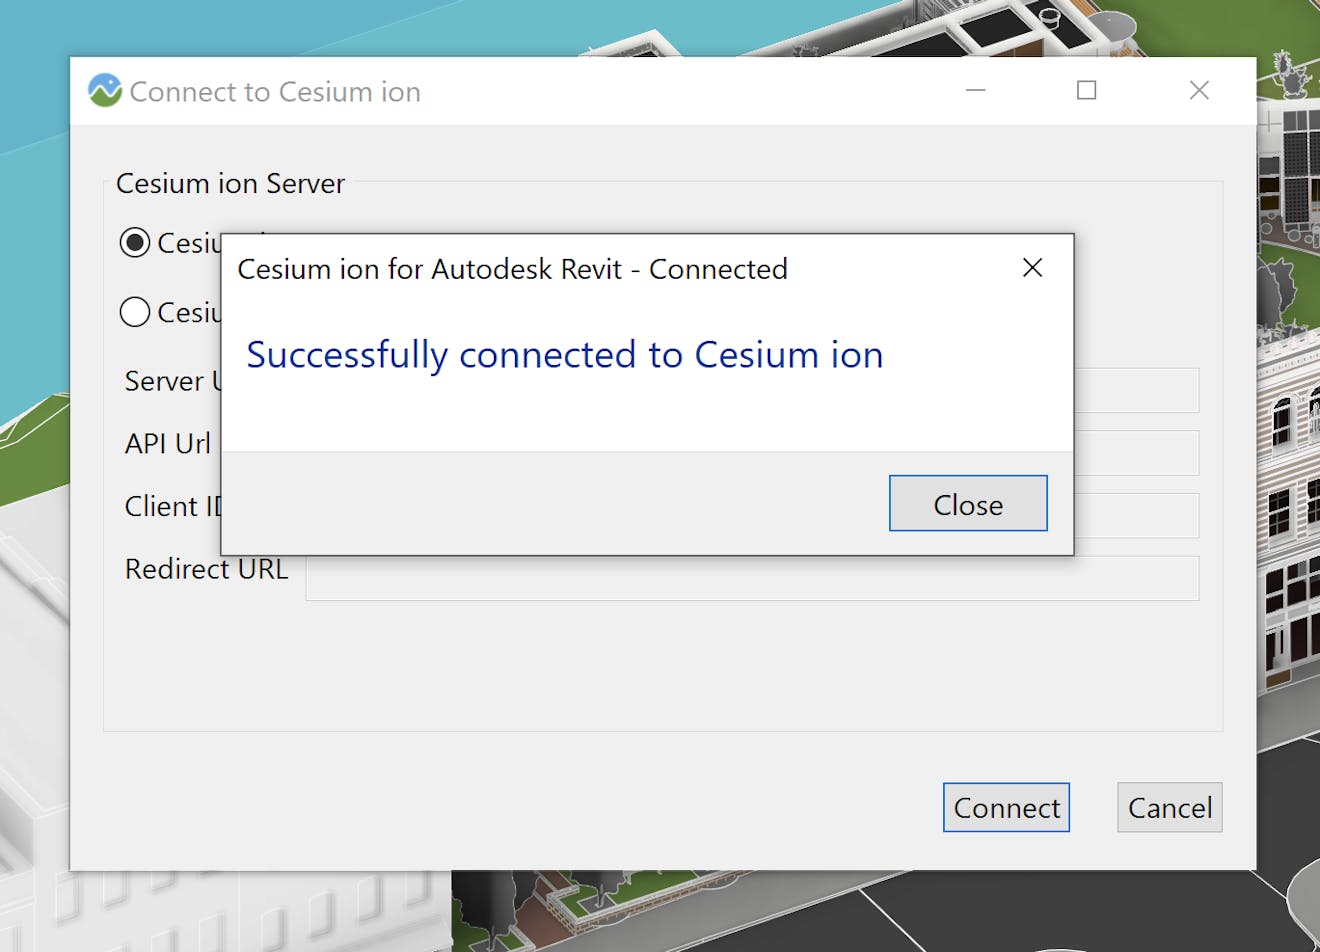
If authorization is successful, there should be a notification in your Revit window that you successfully connected to Cesium ion.
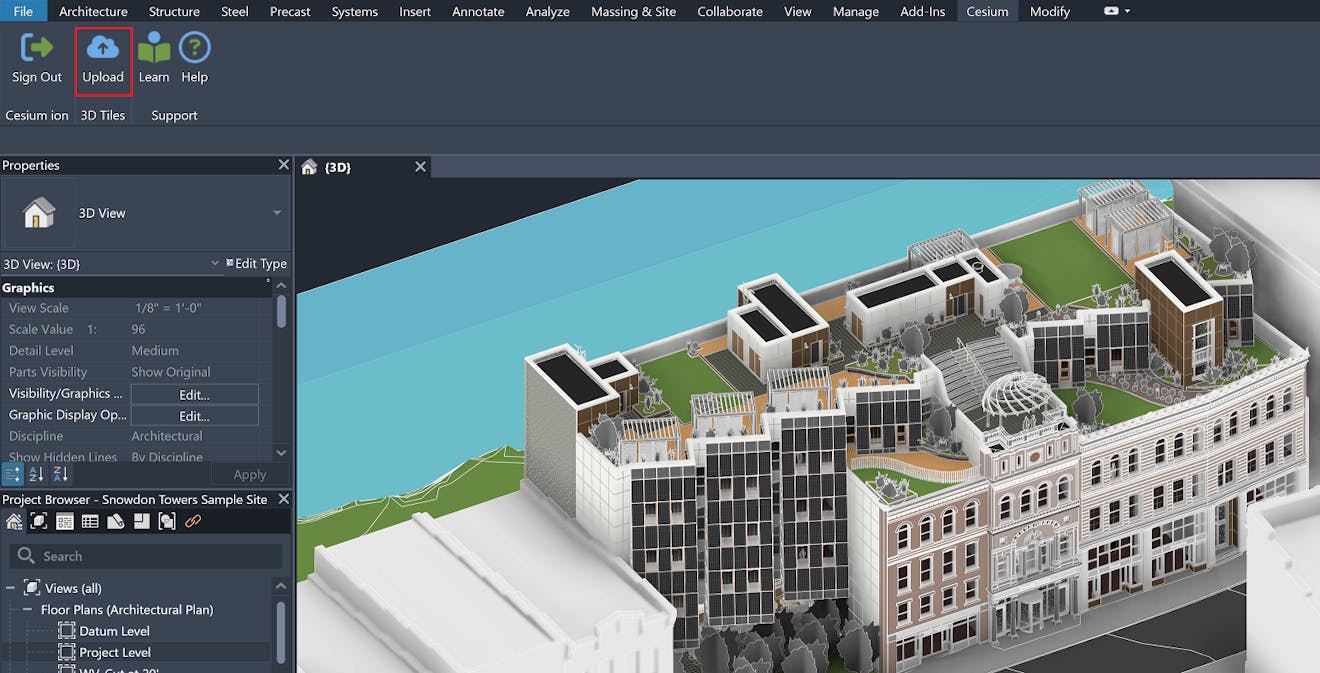
Navigate to a 3D View and ensure the content visible is what you want uploaded. In this example we are using the Snowdon Architecture sample.
In the Cesium ribbon, click Upload to open the upload configuration window.
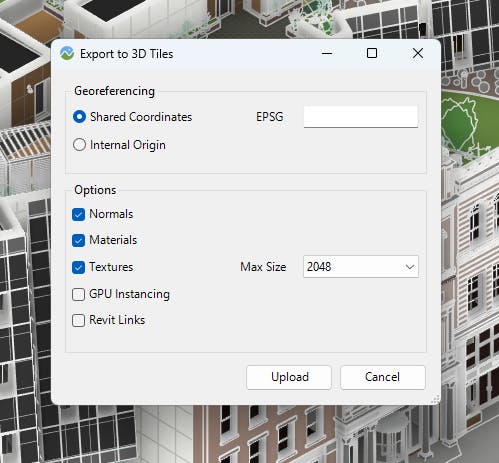
Review and select the desired preferences for your uploaded data. For more information, see the Export Preferences section below.
Select the options as shown below and click Upload to begin uploading your design data to Cesium ion.
When the upload is complete, you will have a 3D Tileset of your design data hosted on Cesium ion. This data can be streamed into any client that supports 3D Tiles, such as CesiumJS or Cesium for Unreal.
For more information on georeferencing, see the Exporting with Georeferencing section below.
Options
Normals exports surface normals for geometry.
Materials exports materials using color values from Revit.
Textures exports color textures for materials if present.
Max Size resizes textures to a maximum resolution, which can help reduce memory usage.
GPU Instancing * detects and uses GPU instancing for eligible geometry on export. This can optimize rendering performance and reduce memory usage.
Revit Links exports geometry for Revit files linked to the project.
* Currently, instancing is supported by CesiumJS and Cesium for Unreal, with support for Cesium for Unity and Cesium for Omniverse coming soon.
Exporting with Georeferencing
For Revit projects located within a geospatial Coordinate Reference System (CRS), the following prerequisites are needed:
- Ensure the EPSG code corresponds to the project’s CRS.
- The project must use shared coordinates that accurately position the project within the CRS.
In this example, the Snowdon sample provided with Autodesk Revit is located in the NAD83 / Pennsylvania South (ftUS) CRS, which is EPSG:2272. Elevations are relative to the EGM96 geoid (EPSG:5773). To automatically place this on the globe during tiling, you would:
- Select Shared Coordinates in the preferences window.
- Set the EPSG code to 2272+5773.
If your project does not use Shared Coordinates or if you do not know the EPSG code for its CRS, you can export using Internal Origin and manually position the data on the globe when uploading to Cesium ion using the Tiles Location Editor.
Materials and textures
When exporting with materials, the following values will be used:
- Base Color RGB
- Base Color Texture
- Opacity
Revit has various material configurations, and some information may not currently be supported.
Metadata
All parameters associated with each specific Element in the 3D View are exported as metadata. This includes both instance parameters (specific to an element instance) and type parameters (common to all instances of a given type).
Metadata is supported in the following Cesium clients - Cesium for Unreal v2.11.0 or later, Cesium for Unity v1.14.0 or later, and CesiumJS v 1.124.0 or later.
Once the upload has completed, click Open in Cesium ion to view your design as 3D Tiles.
This will open Cesium ion in a new browser window, displaying your Cesium ion Asset Library.
You will see an asset listed with the same name as the Revit file that was uploaded. Because we supplied precise location information, the model is correctly positioned in Brownsville, Pennsylvania, USA.
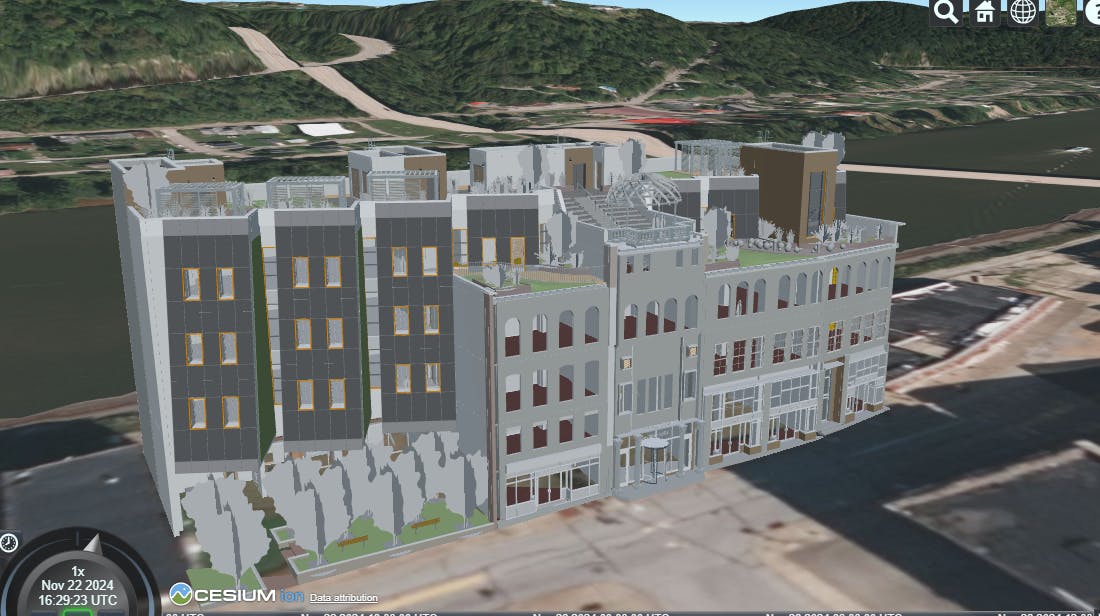
If your data does not have projection or coordinate system information, you will need to manually place the model in the correct location on the globe. Within Cesium ion you can quickly and easily adjust the tileset location through the Tiles Location Editor.
Now that you have created a 3D Tileset of your Revit data, you can start sharing this content several ways, for example:
- Build a no-code application by creating Cesium Stories.
- Share the data on the web using CesiumJS.
- Bring your data to life with Cesium for Unreal, Cesium for Unity, or Cesium for Omniverse.